Getting Started with Jekyll and GitHub Pages: A Comprehensive Guide
Embarking on the journey of creating a personal website or a project blog can seem daunting, especially with the myriad of options available. However, for those seeking a lightweight, secure, and highly customizable solution, the combination of Jekyll and GitHub Pages stands out as an exceptionally powerful duo. This guide will walk you through the entire process, from understanding the core concepts to deploying your first Jekyll blog, providing practical solutions to common challenges you might encounter.
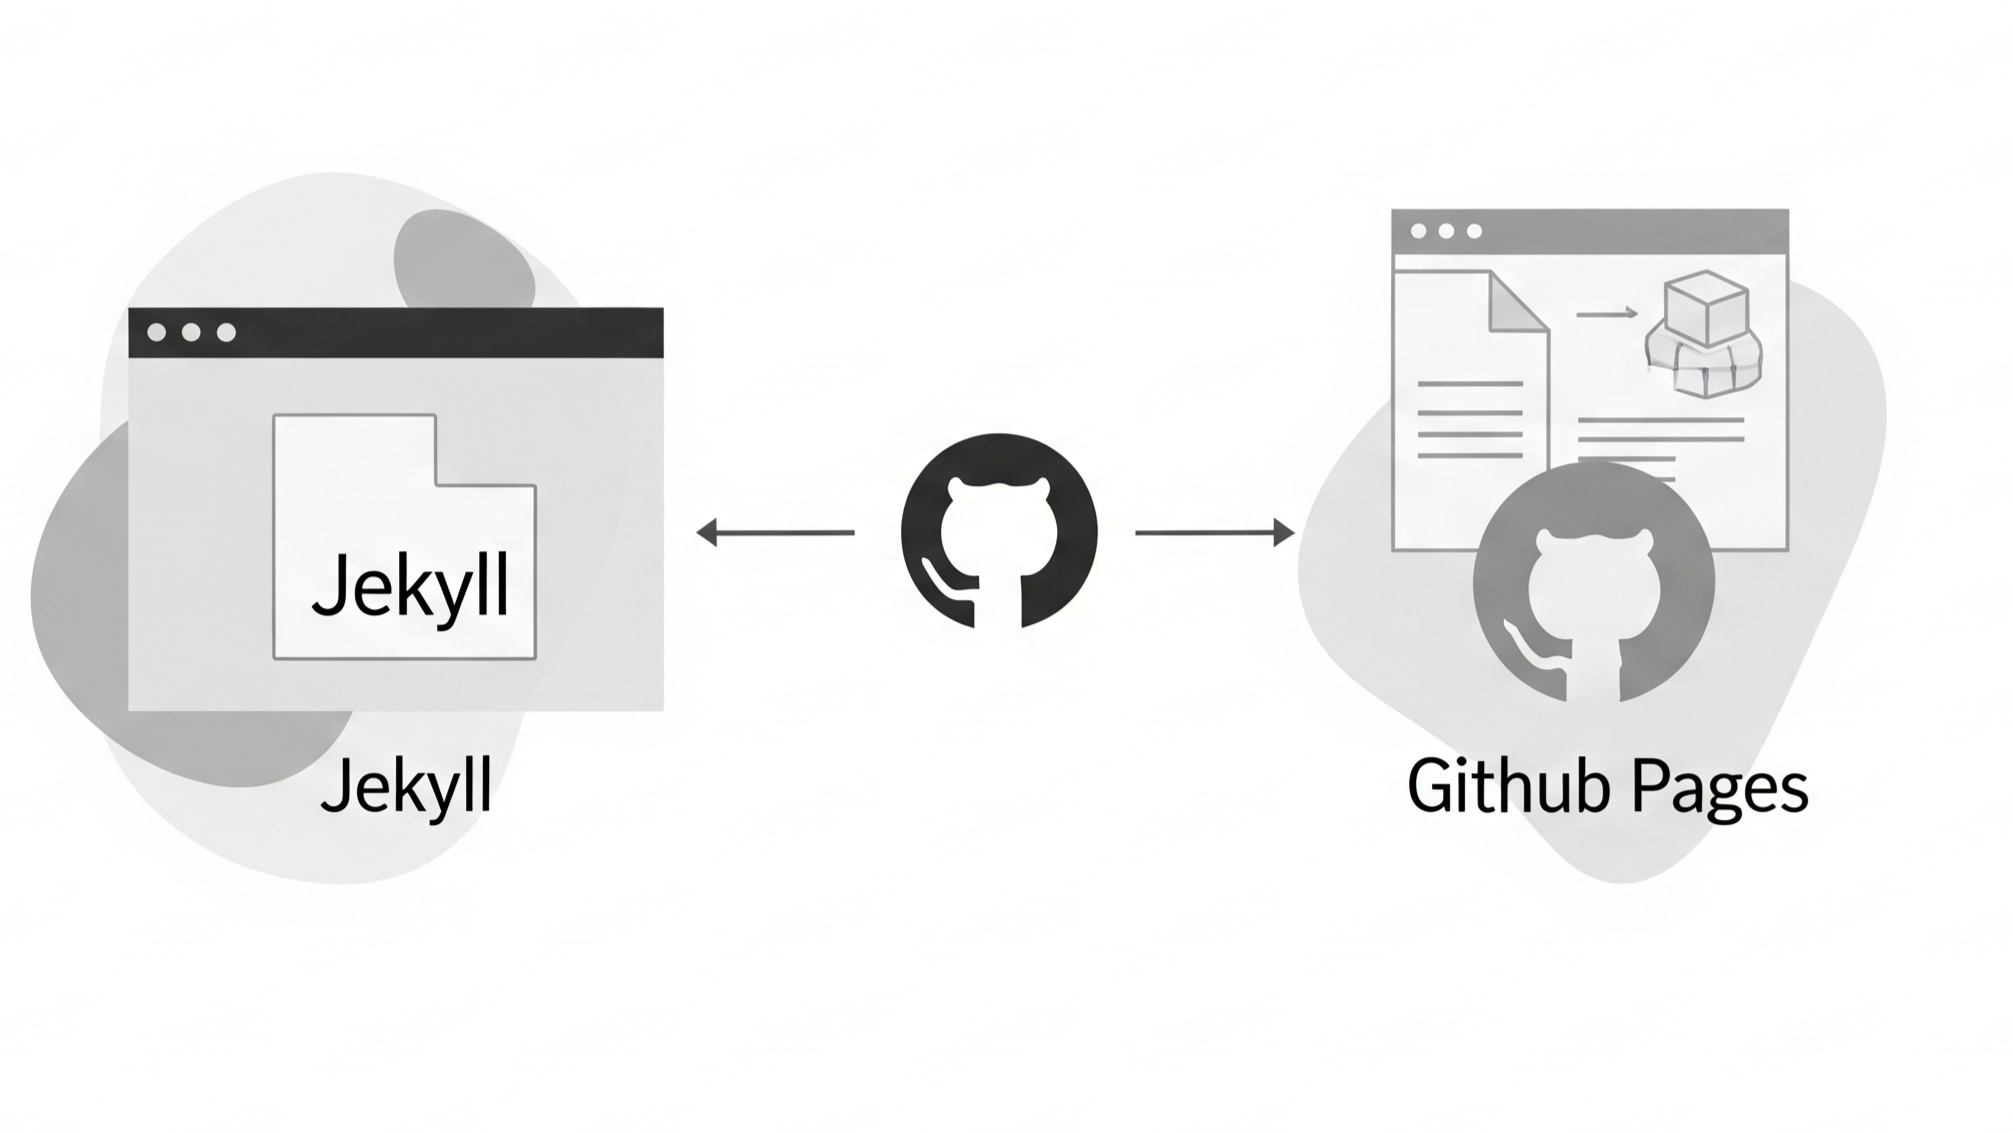
Jekyll is a static site generator that takes plain text files written in Markdown, liquid, or other markup languages, and runs them through a converter to create a static website. Unlike dynamic content management systems like WordPress, Jekyll generates all your pages beforehand, resulting in faster load times, enhanced security, and simplified hosting. GitHub Pages, on the other hand, is a free hosting service provided by GitHub that allows you to publish websites directly from a GitHub repository. When combined, they offer a robust and free platform for blogging, portfolio sites, or project documentation.
The beauty of this setup lies in its simplicity and efficiency. You write your content in Markdown, push it to your GitHub repository, and GitHub Pages automatically builds and publishes your site. This workflow eliminates the need for databases, server-side scripting, and complex deployments, making it an ideal choice for developers, writers, and anyone who wants full control over their web presence without the overhead of traditional web hosting.
Before diving into the technical steps, it is crucial to grasp the fundamental concepts. Understanding how Jekyll processes your content and how GitHub Pages serves it will empower you to troubleshoot issues effectively and customize your site to your exact specifications. This guide aims to demystify these processes, providing a clear roadmap for both beginners and those with some prior experience in web development.
Setting Up Your GitHub Account and Repository
The very first step in leveraging GitHub Pages is to have a GitHub account. If you do not already have one, signing up is a straightforward process. Once your account is active, you will need to create a new repository specifically for your Jekyll blog. This repository will house all your Jekyll files, including your content, themes, and configuration.
Creating Your GitHub Account
Problem: You do not have a GitHub account and need to sign up. Without an account, you cannot create repositories or utilize GitHub Pages.
Solution: Navigate to the GitHub website and click on the "Sign up" button. Follow the prompts to create your account. This typically involves choosing a username, providing an email address, and setting a strong password. You may also be asked to verify your email address. It is important to choose a memorable yet secure username, as this will often be part of your GitHub Pages URL.
Creating a New Repository for Your Jekyll Blog
Problem: You need a dedicated space on GitHub to store your Jekyll blog files. The naming convention for GitHub Pages repositories is crucial for automatic deployment.
Solution: Once logged into GitHub, click on the "New" repository button, usually found on your dashboard or by clicking the plus icon in the top right corner. For a personal user site, the repository name must be in the format your-username.github.io. For a project site, you can name it anything you like, but it will be served from a subfolder (e.g., your-username.github.io/your-repository-name). For your main blog, stick to the your-username.github.io format. Choose "Public" visibility so GitHub Pages can serve your site, and optionally initialize it with a README file.
Cloning Your Repository to Your Local Machine
Problem: You need to work on your Jekyll blog files locally on your computer, but they currently only exist on GitHub.
Solution: After creating your repository on GitHub, you need to clone it to your local machine. Open your terminal or command prompt and navigate to the directory where you want to store your project. Use the command git clone https://github.com/your-username/your-username.github.io.git (replace with your actual repository URL). This command downloads a copy of your repository to your local machine, allowing you to make changes offline and then push them back to GitHub.
Installing Jekyll and Setting Up Your Development Environment
With your GitHub repository ready, the next step is to set up your local development environment by installing Jekyll and its dependencies. Jekyll is built with Ruby, so you will need a Ruby installation on your system.
Installing Ruby and RubyGems
Problem: Jekyll requires Ruby to run. Without a proper Ruby installation, you cannot use Jekyll commands locally.
Solution: The installation process for Ruby varies slightly depending on your operating system. For macOS users, Ruby often comes pre-installed, but it is recommended to use a version manager like rbenv or RVM to avoid conflicts with the system Ruby. For Windows users, the RubyInstaller for Windows is the easiest way to get started. Linux users can typically install Ruby through their distribution's package manager (e.g., sudo apt-get install ruby-full on Debian/Ubuntu). Once Ruby is installed, RubyGems, Ruby's package manager, should also be available.
Installing Jekyll
Problem: You need to install the Jekyll gem to create and manage your Jekyll sites.
Solution: Open your terminal or command prompt and run the command gem install jekyll bundler. This command installs Jekyll and Bundler, a gem that manages your project's Ruby dependencies. Bundler ensures that everyone working on the project uses the same gem versions, preventing compatibility issues.
Creating a New Jekyll Site
Problem: You want to start a new Jekyll blog from scratch within your cloned repository, or you want to generate a new Jekyll project structure.
Solution: Navigate into your cloned repository directory using your terminal: cd your-username.github.io. Then, to create a new Jekyll site, you have two main options. If you want Jekyll to set up a new project structure within your existing repository, use jekyll new . --force (the --force flag is needed if the directory is not empty, which it won't be if you've already cloned the repo). This will scaffold a basic Jekyll site with a default theme and essential files. Alternatively, if you prefer to start with a blank slate or use a custom theme, you can manually create the necessary files and folders, such as _config.yml, index.md, and the _posts directory.
Serving Your Jekyll Site Locally
Problem: You want to preview your Jekyll blog in your web browser before deploying it to GitHub Pages to ensure everything looks as expected.
Solution: Within your Jekyll project directory in the terminal, run the command bundle exec jekyll serve. This command starts a local web server, typically at http://localhost:4000. You can then open your web browser and navigate to this address to see your Jekyll blog. Jekyll will automatically rebuild your site whenever you make changes to your files, allowing for real-time previewing. This local server is invaluable for development and debugging.
Understanding Jekyll's Structure and Content Creation
Jekyll organizes your website content in a structured manner, making it easy to manage posts, pages, and static assets. Understanding this structure is key to effectively creating and organizing your blog content.
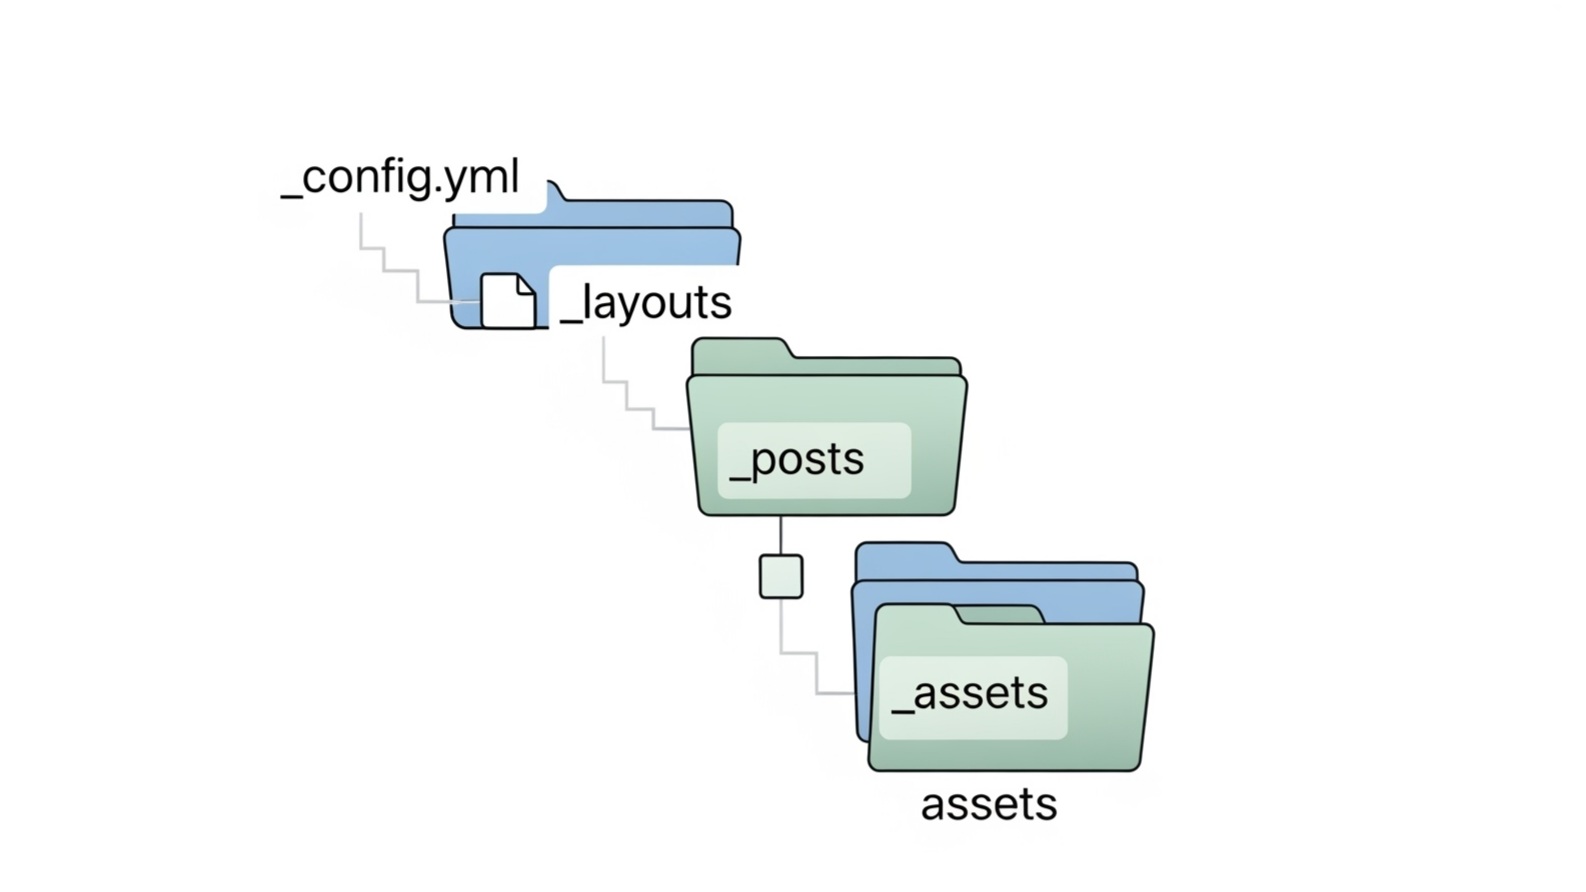
Jekyll's Directory Structure
Problem: You need to understand where to place different types of content and configuration files within your Jekyll project.
Solution: A typical Jekyll project includes several important directories and files:
_posts/: This directory holds your blog posts. Each post is a Markdown file (e.g., YYYY-MM-DD-title.md) with specific front matter at the top._layouts/: Contains HTML templates that define the structure of your pages and posts. For example, a post.html layout might define how a blog post is displayed, including the header, footer, and content area._includes/: Stores reusable snippets of HTML or Liquid code that can be included in your layouts or other pages, such as navigation bars, sidebars, or footer content._sass/: Used for Sass/SCSS files, which are compiled into CSS for styling your site.assets/: A common place to store images, JavaScript files, and other static assets._config.yml: The primary configuration file for your Jekyll site. Here you can set site-wide variables, permalinks, pagination settings, and more.- Root directory files: index.md or index.html serves as your homepage. Other Markdown or HTML files in the root become standalone pages.
By adhering to this structure, Jekyll can efficiently process your content and build your static website.
Creating Your First Blog Post
Problem: You want to write your first blog post and have it appear on your Jekyll site.
Solution: Navigate to the _posts/ directory within your Jekyll project. Create a new Markdown file with the naming convention YYYY-MM-DD-your-post-title.md. For example, 2025-07-28-my-first-post.md. At the very top of this file, you must include front matter, which is a block of YAML data enclosed by triple-dashed lines. Essential front matter for a post includes:
---
layout: post
title: "My First Blog Post on Jekyll"
date: 2025-07-28 18:00:00 +0700
categories: [getting started, blogging]
---
After the front matter, you can write your post content using Markdown syntax. Jekyll will process this Markdown into HTML and display it according to your post layout.
Creating Static Pages
Problem: You need to create pages that are not blog posts, such as an "About" page or a "Contact" page.
Solution: To create a static page, simply create a Markdown or HTML file directly in the root directory of your Jekyll project (or in a subdirectory if you want nested URLs). For example, about.md for an about page. Like posts, these pages can also include front matter for custom layouts or titles:
---
layout: page
title: "About Me"
permalink: /about/
---
The permalink attribute allows you to define a clean URL for your page, such as your-username.github.io/about/.
Customizing Your Jekyll Site
Jekyll offers extensive customization options, from changing the visual appearance of your site to configuring how content is processed and displayed.
Choosing and Customizing a Theme
Problem: The default Jekyll theme might not suit your aesthetic preferences, and you want to apply a different theme or customize the existing one.
Solution: There are many free and premium Jekyll themes available online. You can find them on sites like Jekyll Themes, Jamstack Themes, or by searching GitHub. To use a theme, you generally download its files and integrate them into your Jekyll project, often by replacing existing _layouts, _includes, and _sass directories. Some themes are distributed as Ruby gems; in such cases, you add the theme gem to your Gemfile and specify it in your _config.yml. Once a theme is applied, you can customize it by overriding its files. For example, to change the CSS, you might create a main.scss file in your _sass directory and import the theme's styles, then add your own custom rules. For more significant changes, you might copy a layout from the theme's gem and modify it directly in your _layouts directory.
Configuring Your Site with _config.yml
Problem: You need to set site-wide variables, define permalink structures, or configure plugins for your Jekyll blog.
Solution: The _config.yml file is your central hub for Jekyll site configuration. It is a YAML file where you can define global variables that can be accessed in your templates using Liquid syntax (e.g., {{ site.title }}). Common configurations include:
title: The title of your website.description: A brief description of your site for SEO purposes.baseurl: Important if your site is hosted in a subdirectory (e.g., for project pages). For user pages (your-username.github.io), it should generally be left blank or set to /.permalink: Defines the URL structure for your posts (e.g., /blog/:year/:month/:day/:title/).plugins: A list of Jekyll plugins you want to enable.theme: Specifies the Jekyll theme gem to use.
Any changes to _config.yml require restarting your local Jekyll server (bundle exec jekyll serve) to take effect.
Using Liquid for Dynamic Content
Problem: You want to display dynamic content, such as site variables, post lists, or conditional content, within your Jekyll templates.
Solution: Jekyll uses Liquid, a templating language developed by Shopify, to process dynamic content. Liquid allows you to embed variables, loops, and conditional statements directly within your HTML or Markdown files. Key Liquid concepts include:
- Outputting variables: Use double curly braces, e.g., {{ site.title }} to display the site title, or {{ post.title }} to display the current post's title.
- Tags: Used for logic and control flow, enclosed in curly braces and percent signs, e.g., {% for post in site.posts %} to loop through all blog posts, or {% if page.title %} for conditional rendering.
- Filters: Modify output, e.g., {{ "hello world" | capitalize }} would output "Hello world".
Mastering Liquid allows you to create highly flexible and dynamic Jekyll templates.
Managing Images and Other Assets
A visually appealing blog often includes images, videos, and other media. Effectively managing these assets is crucial for both performance and maintainability.
Storing and Referencing Images
Problem: You want to include images in your blog posts or pages, and ensure they are correctly displayed.
Solution: Create an assets/images/ directory (or similar) within your Jekyll project to store your images. When referencing images in your Markdown or HTML, use relative paths. For example, if you have an image named my-image.jpg in assets/images/, you would reference it in Markdown like this: . It is important to use a leading slash / to ensure the path is relative to the root of your site, which works consistently across local development and GitHub Pages deployment.
Optimizing Images for Web Performance
Problem: Large image files can slow down your website, negatively impacting user experience and SEO.
Solution: Before adding images to your Jekyll site, optimize them for web use. This involves compressing them to reduce file size without significant loss of quality. Tools like TinyPNG, ImageOptim, or online image compressors can help with this. Consider using modern image formats like WebP for even better compression and quality where supported. For responsive design, think about using HTML's srcset attribute to provide different image sizes for various screen resolutions, or leverage Jekyll plugins that can automate image optimization.
Deploying Your Jekyll Blog to GitHub Pages
Once your Jekyll blog is ready, the final step is to deploy it to GitHub Pages, making it accessible to the world.
Pushing Your Changes to GitHub
Problem: Your local Jekyll project needs to be synchronized with your GitHub repository so GitHub Pages can build and serve it.
Solution: After making changes to your Jekyll files locally, you need to commit them and push them to your GitHub repository. Open your terminal in your project directory and execute the following Git commands:
- git add .: Stages all changes for commit.
- git commit -m "Initial Jekyll blog setup": Commits the staged changes with a descriptive message.
- git push origin main: Pushes your committed changes to the main branch of your GitHub repository. (Note: main is the standard default branch name, but your repository might use master.)
GitHub Pages automatically detects pushes to the main (or master) branch (or the specified publishing source in your repository settings) and triggers a build process.
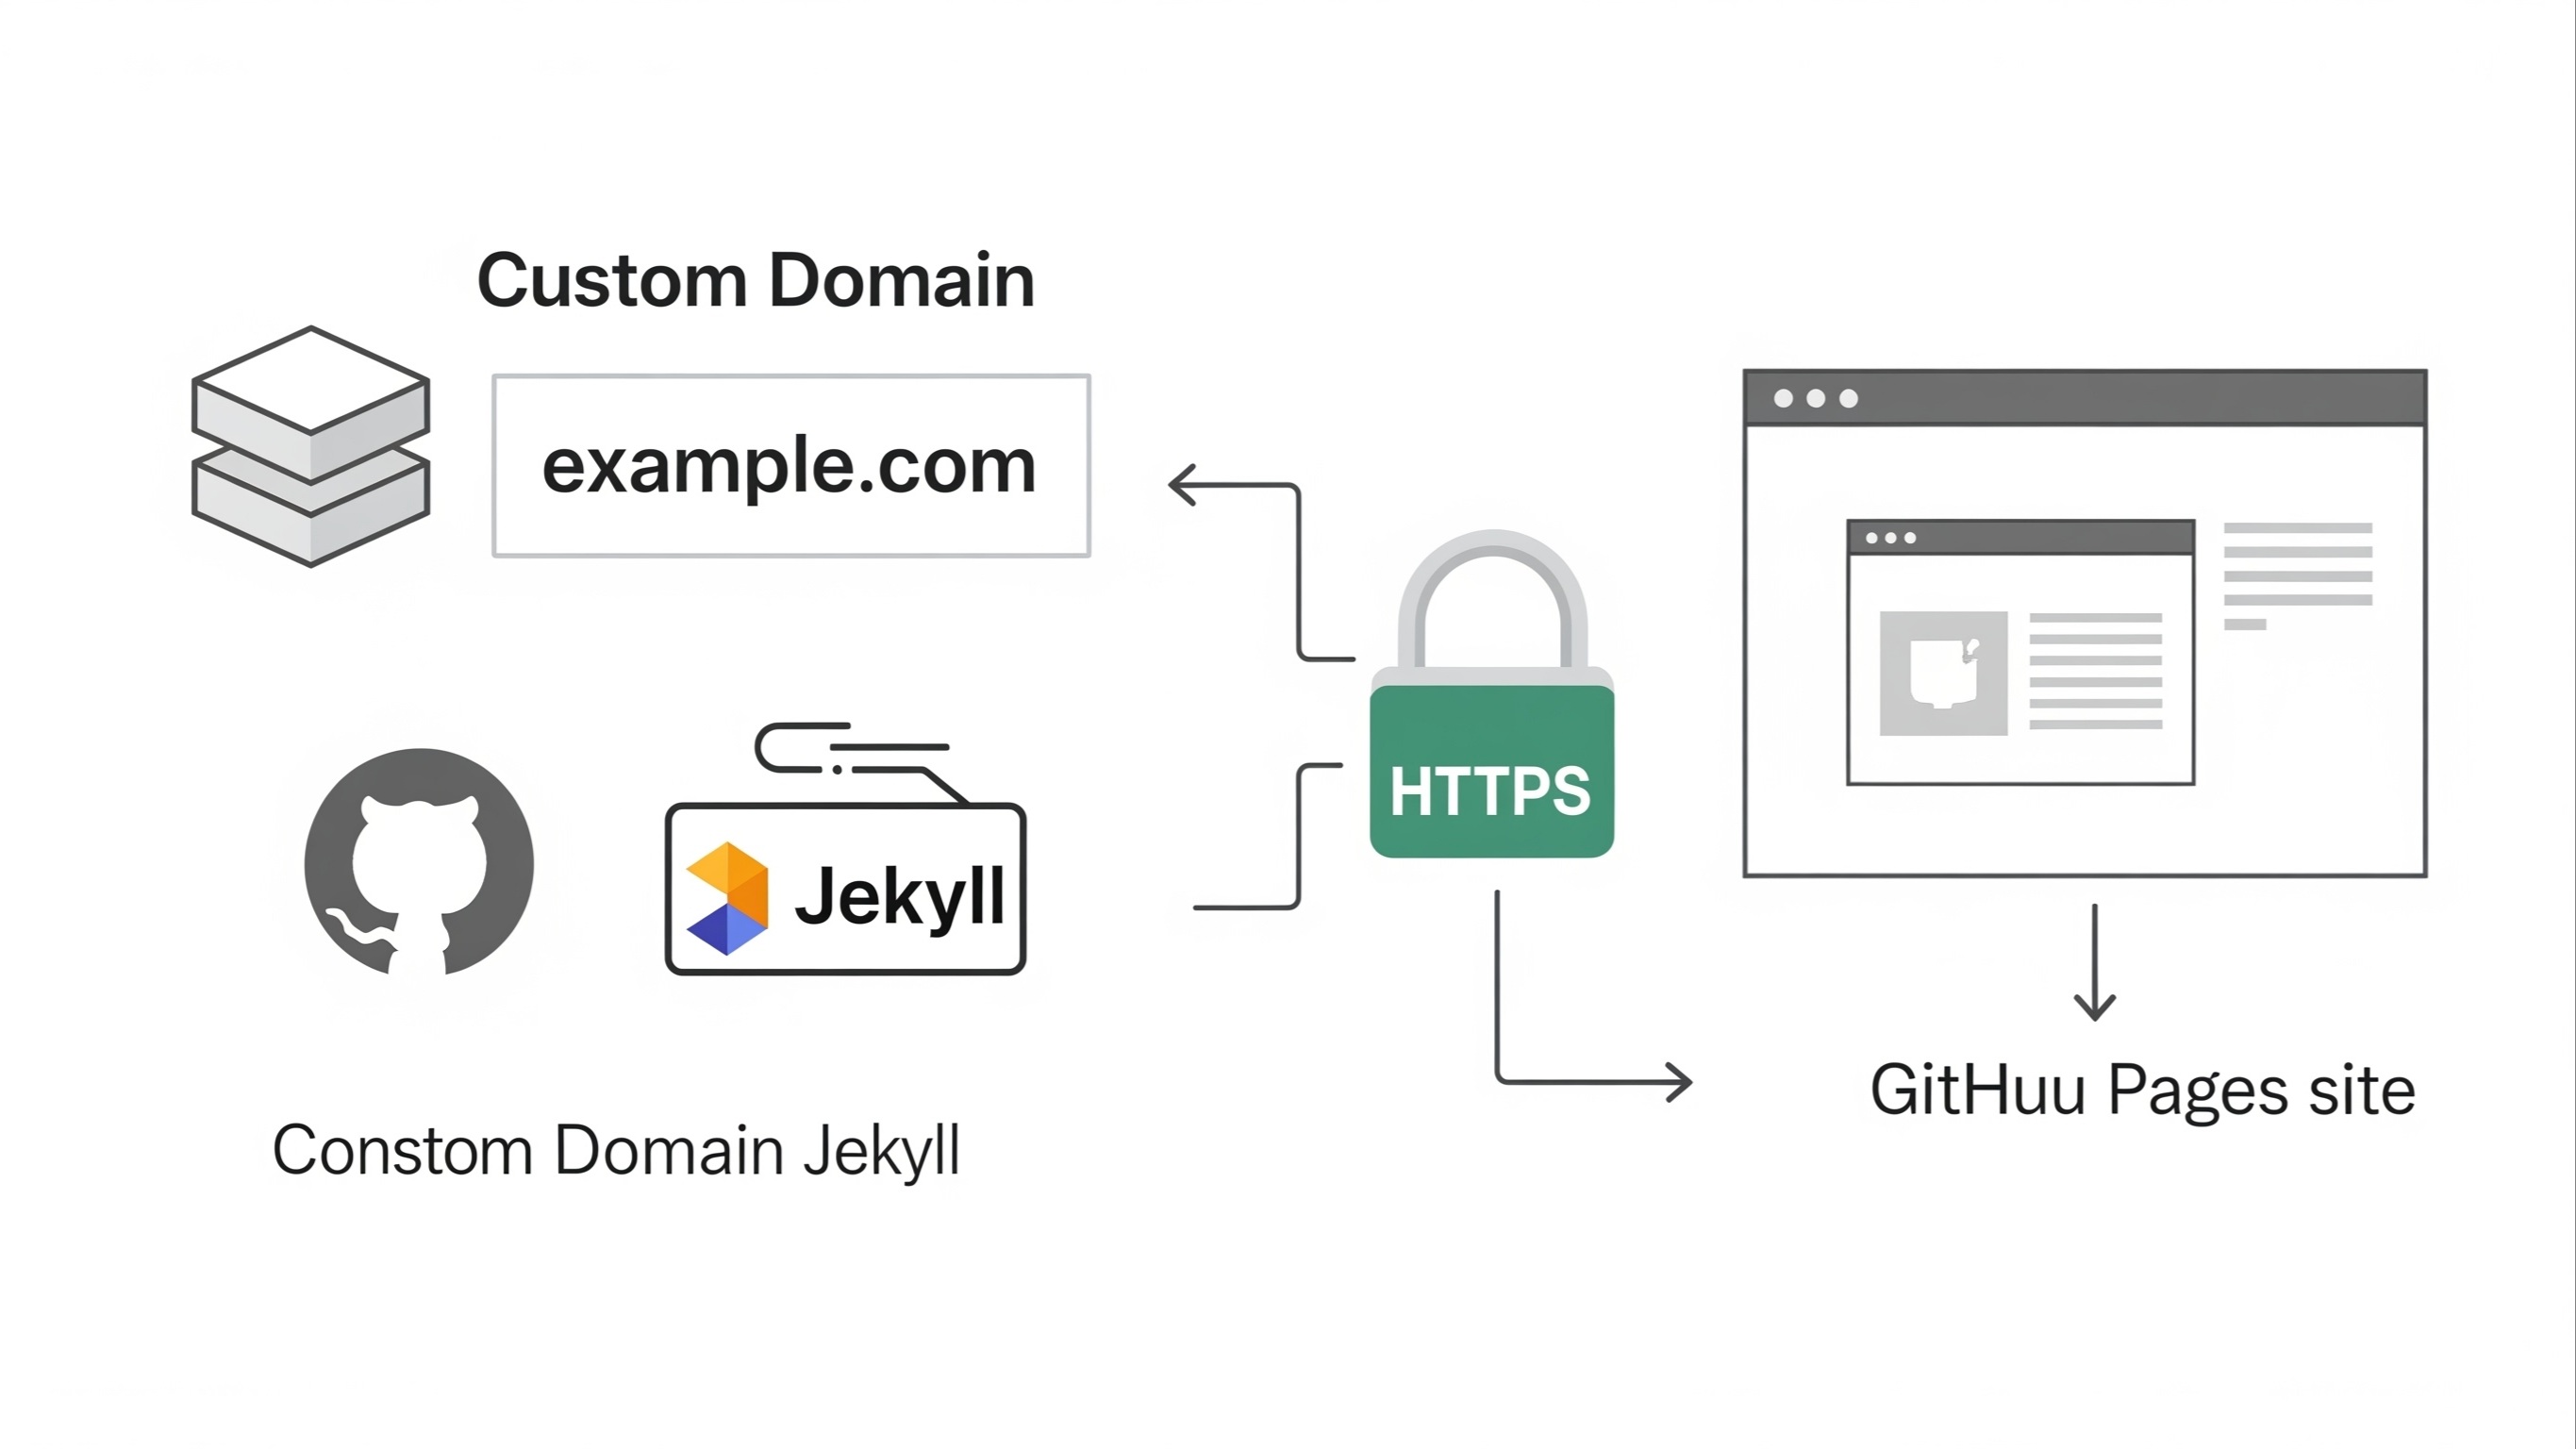
Configuring GitHub Pages Settings
Problem: You need to ensure GitHub Pages is correctly configured to build and serve your Jekyll site from the correct branch.
Solution: Go to your repository on GitHub. Navigate to the "Settings" tab, then click on "Pages" in the left sidebar. Under "Build and deployment", ensure the "Source" is set to "Deploy from a branch" and select the correct branch (usually main or master). The /root folder is typically the correct option for the folder where your Jekyll site is built. Once configured, GitHub Pages will automatically build your Jekyll site whenever you push changes to that branch. You will see a green checkmark next to your last commit on GitHub if the build was successful. Your site will typically be live at https://your-username.github.io within a few minutes.
Troubleshooting Common Deployment Issues
Problem: Your Jekyll site is not appearing on GitHub Pages, or the build is failing.
Solution:
- Check GitHub Actions/Pages build logs: On your GitHub repository, go to the "Actions" tab. If a build failed, you will see a red X. Click on the failed workflow run to view the detailed logs, which often pinpoint the exact error.
- Local vs. GitHub Pages Jekyll versions: GitHub Pages uses a specific version of Jekyll and its dependencies. Sometimes, your local Jekyll version might be newer or older, leading to discrepancies. To mitigate this, ensure your Gemfile.lock is committed to your repository. GitHub Pages will use the exact gem versions specified in your Gemfile.lock.
- Base URL issues: If your site is not your-username.github.io (e.g., it is a project page at your-username.github.io/your-repository-name), you need to set the baseurl in your _config.yml to /your-repository-name/.
- Front matter errors: Missing or malformed front matter in your Markdown files can cause build failures. Ensure every post and page has valid YAML front matter enclosed in triple-dashed lines.
- Unsupported plugins: GitHub Pages only supports a specific set of Jekyll plugins. If you are using a plugin not on their whitelist, the build will fail. For custom plugins, you will need to build your site locally and push the generated _site directory to GitHub, or use a custom GitHub Actions workflow to build.
Patience is key during troubleshooting. Reviewing the logs thoroughly will almost always reveal the underlying issue.
Maintaining and Growing Your Jekyll Blog
Once your Jekyll blog is live, ongoing maintenance and content creation are essential for its continued success.
Regular Content Creation
Problem: You need to consistently add new posts and content to keep your blog fresh and engaging.
Solution: Establish a content calendar and commit to a regular publishing schedule. New content not only keeps your audience engaged but also signals to search engines that your site is active and relevant. Focus on creating high-quality, valuable content that addresses your audience's needs and interests. Remember the Jekyll workflow: create a new Markdown file in _posts/ (or a new page), write your content with front matter, preview locally, then commit and push to GitHub.
Updating Jekyll and Dependencies
Problem: Over time, Jekyll and its associated gems will release updates with new features, bug fixes, and security patches. You need to keep your blog up to date.
Solution: Periodically run bundle update in your project directory. This command updates all the gems listed in your Gemfile to their latest compatible versions. After updating, run bundle exec jekyll serve to ensure everything still works correctly locally before pushing changes to GitHub. It is a good practice to update your dependencies regularly to leverage the latest improvements and maintain security.
Backing Up Your Site
Problem: Data loss can occur due to accidental deletions, hardware failures, or other unforeseen circumstances. You need a reliable backup strategy for your Jekyll blog.
Solution: Since your entire Jekyll site is stored in a Git repository on GitHub, GitHub itself acts as a primary backup. Every push you make creates a new version history of your site. For additional peace of mind, you can regularly pull your repository to another local drive or use automated backup services that can mirror your GitHub repositories to other cloud storage providers.
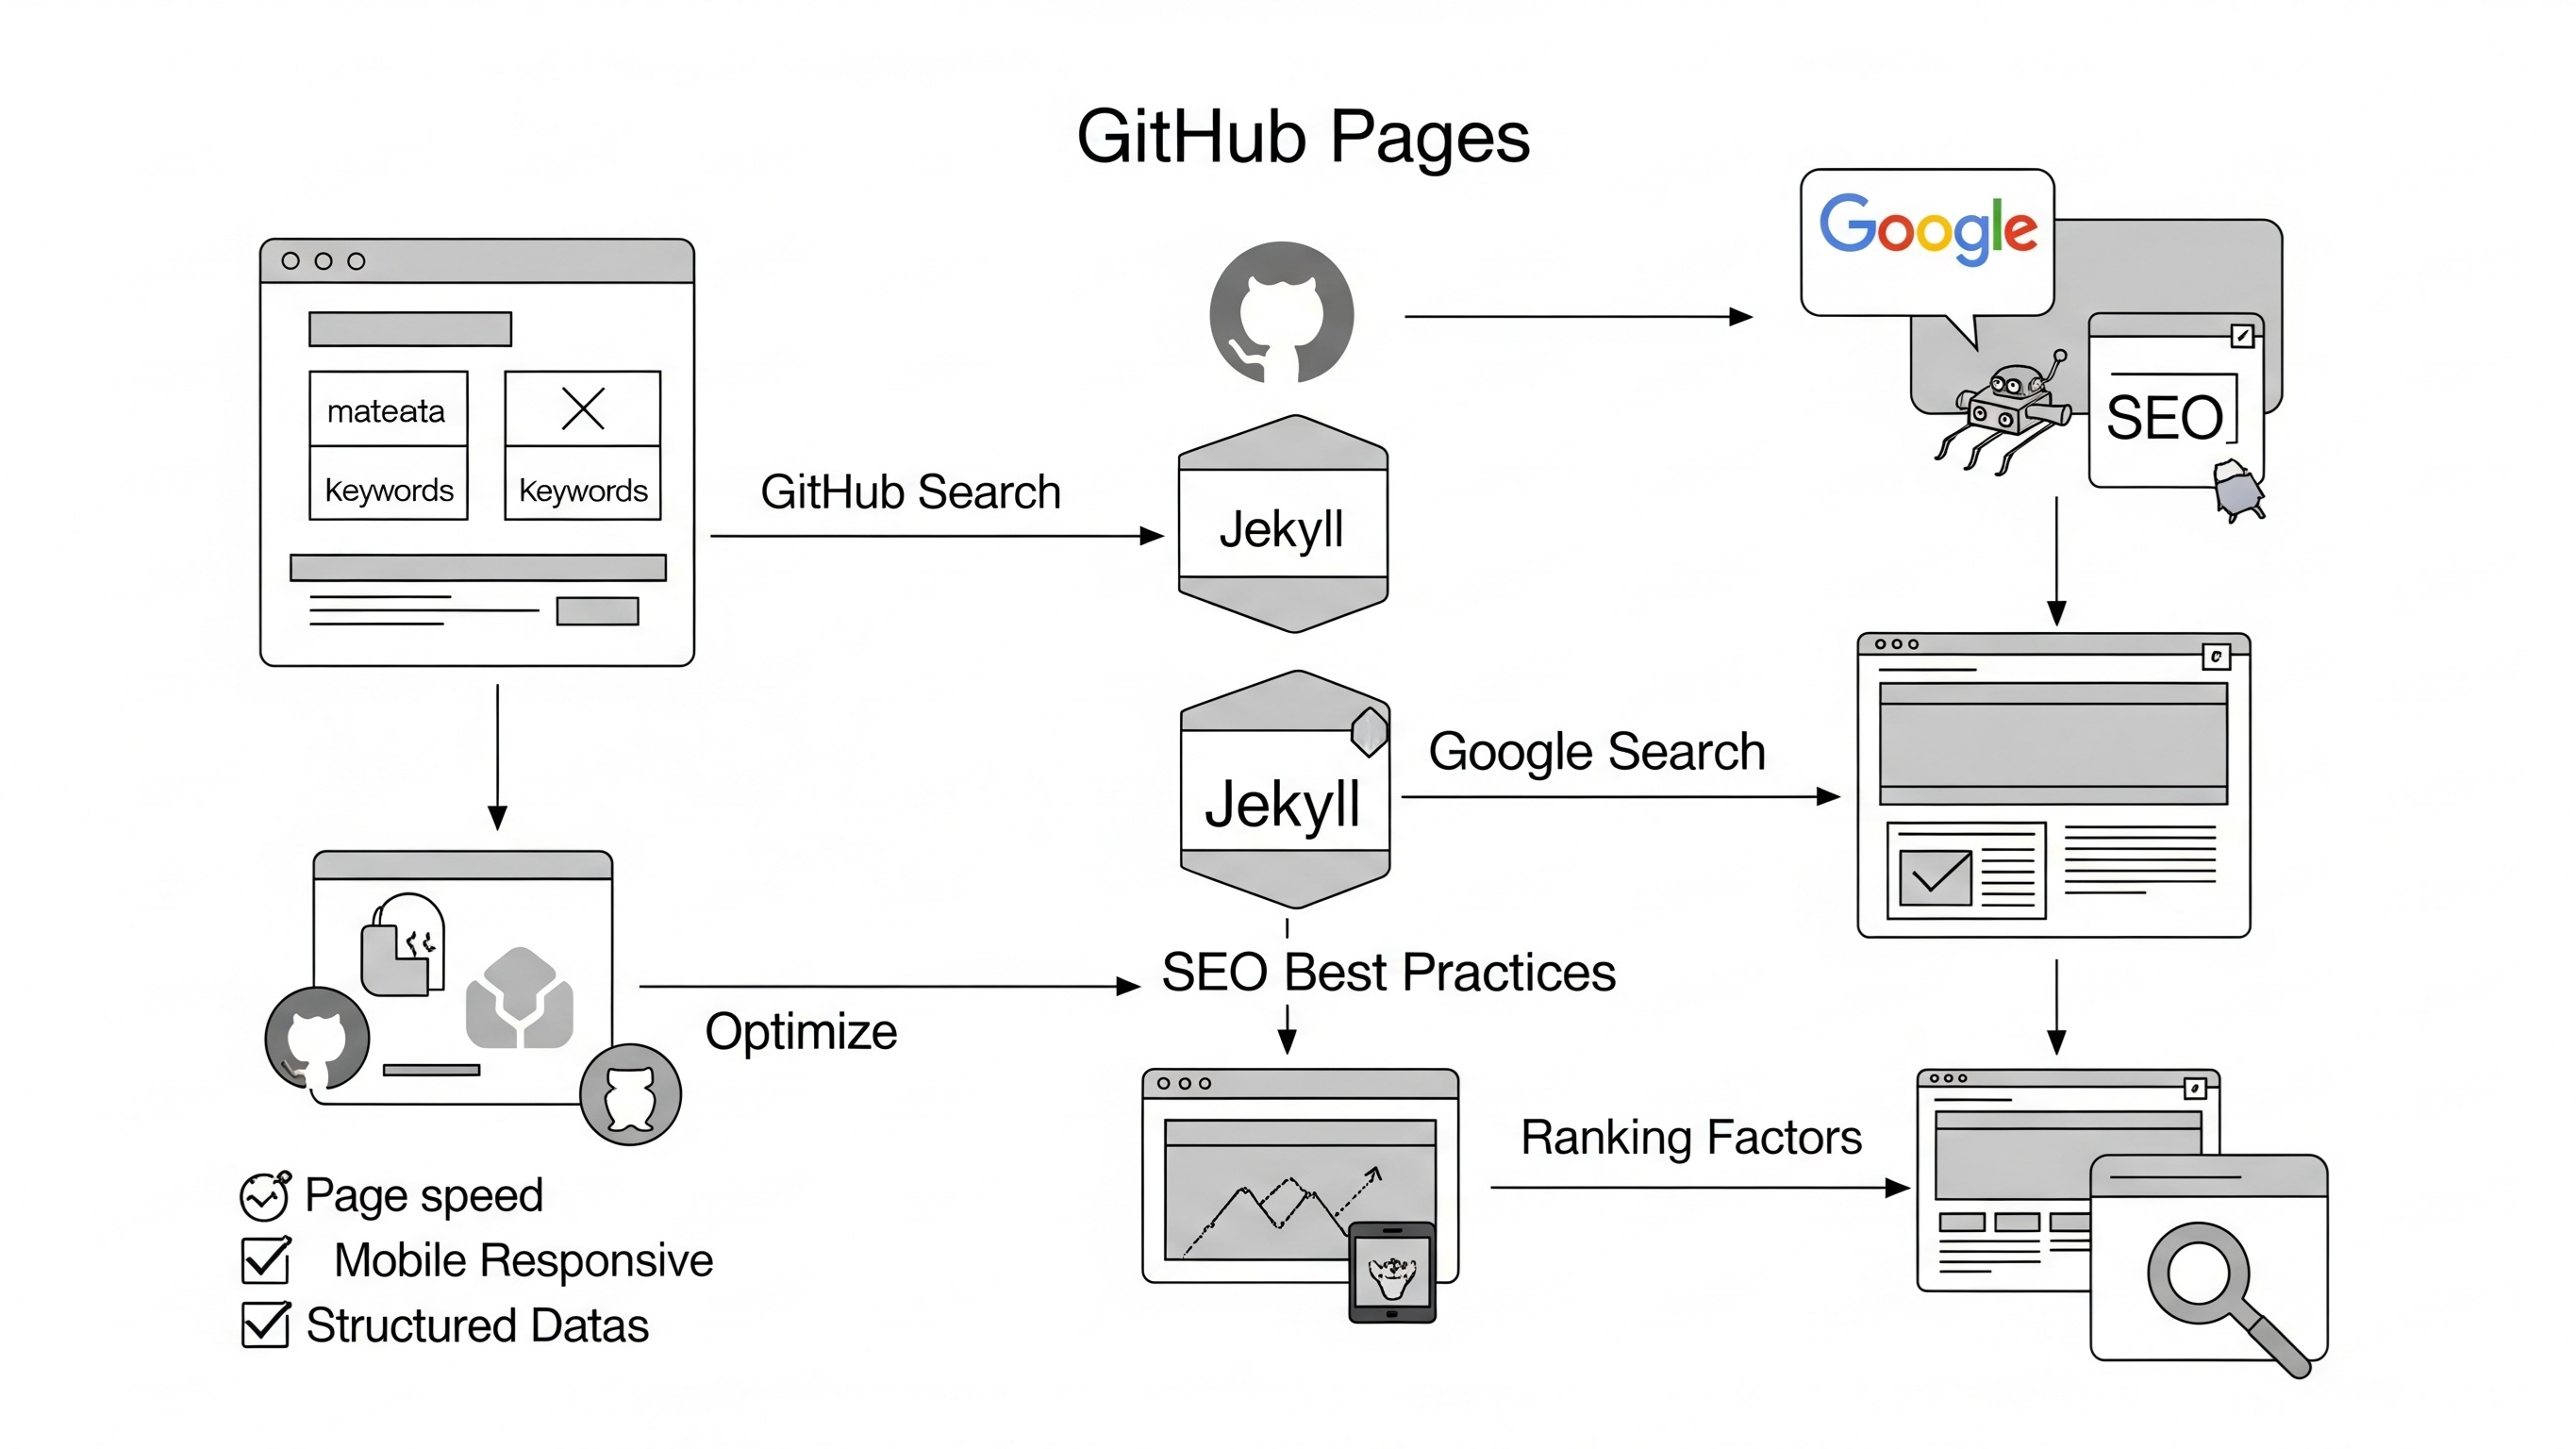
Enhancing SEO for Your Jekyll Blog
Problem: You want your Jekyll blog to rank well in search engine results and attract more organic traffic.
Solution: While Jekyll inherently provides a good foundation for SEO due to its static nature and fast load times, you can further optimize your site:
- Descriptive Titles and Meta Descriptions: Ensure every post and page has a unique, concise, and descriptive title and a compelling meta description in its front matter. This is what appears in search engine results.
- Clean URLs (Permalinks): Use meaningful and keyword-rich permalinks (e.g., /blog/jekyll-github-pages-setup/ instead of /blog/2025/07/28/post1/). Configure this in your _config.yml.
- Semantic HTML and Headings: Use <h2>, <h3>, <h4>, etc., appropriately to structure your content and signal its hierarchy to search engines.
- Image Alt Text: Always include descriptive alt attributes for your images. This improves accessibility and helps search engines understand the image content.
- Sitemaps: Use the jekyll-sitemap plugin to automatically generate a sitemap.xml file, which helps search engines crawl and index your site effectively. Add gem "jekyll-sitemap" to your Gemfile and jekyll-sitemap to your plugins array in _config.yml.
- Google Analytics/Search Console: Integrate Google Analytics to track your website traffic and use Google Search Console to monitor your site's performance in search results and identify any crawling issues.
- Mobile-Friendliness: Ensure your Jekyll theme is responsive and looks good on all devices. Google prioritizes mobile-friendly websites.
By implementing these SEO best practices, you can significantly improve your blog's visibility and reach.